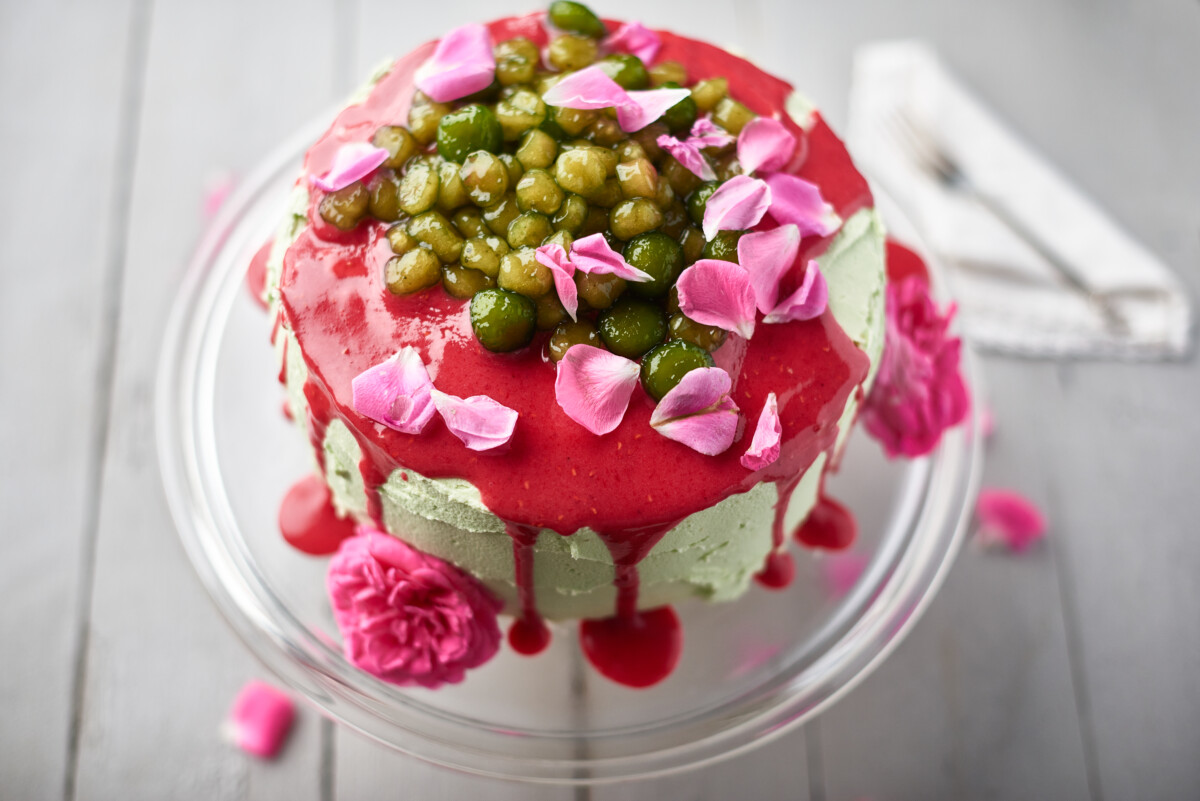
Matcha and Raspberry Bubble Tea Cake
Introducing our delicious Matcha and Raspberry Bubble Tea Cake recipe! This delicious boba lava cake has four amazing components: the milk tea matcha sponge cake, matcha butter icing, raspberry drizzle, and matcha boba pearls. It’s truly a labor of love, but worth every moment (and don’t worry, we offer you some shortcuts if you are pressed for time!).
Each element is delightful on its own and brings so much joy to the baking process. The vanilla sponge is airy and light. The earthy matcha perfectly balances the tangy raspberry drizzle, creating a flavor explosion. Plus, the boba pearls on top add a fun and stunning finishing touch. Get ready to indulge in this beautiful and mouthwatering boba tea cake.
Ingredients
Here’s what you need to make this fabulous raspberry and matcha bubble tea cake recipe. The recipe is based on my granny’s vanilla sponge cake.
Ingredients for the matcha sponge cake recipe
- Cake flour – If at all possible, use cake flour. Cake flour is particularly helpful for producing a bubble tea sponge cake that’s both tender and delicate. That’s because it contains less gluten than all-purpose flour, which helps to prevent the cake from becoming too tough. It also has a higher starch content, allowing the cake to rise more during baking while still preserving its light texture. But there’s one other major advantage to using cake flour over all-purpose or regular flours – it’s finely milled. This ensures that the cake will have finer “crumbs” and be incredibly smooth and soft.
- Baking powder – Adding baking powder to your boba tea milk cake recipe is also important for creating a light and fluffy texture. Baking powder acts as a leavening agent – it helps create air bubbles in the batter that will expand when heated, resulting in a cake that’s soft and spongy.
- Pinch salt – It helps bring out the flavors of the cake.
- Unsalted butter – Make sure it is at room temperature. If it is cold it will be too hard to absorb air, which you need for a fluffy, airy cake.
- Caster sugar – Use a food processor to refine your regular sugar if needed.
- 3 Large Eggs – They should be 50-60g/2 0z each. If you have no idea if you have large eggs or not, then just take three eggs and whisk them up and weigh them. You should have about 180 g total of egg mixture. If you need more, whisk up another egg and add as much as you need to make 180 grams. Easy!
- Whole milk
- Vanilla essence – Vanilla and matcha don’t seem like an obvious pair, but they work really well together. Matcha is earthy, a little bitter, and distinctive in taste. I love pairing it with vanilla which is a gentle taste that leads you cautiously to the flavor of matcha.
- Matcha powder – Matcha is a type of finely ground green tea with a unique flavor. Matcha is certainly an acquired taste, and the way to actively acquire it is to combine it with a little sweetness. Having said that, you can omit the matcha in the cake and just use a bit of green food coloring.
Ingredients for the Matcha Butter Icing/Frosting
- Unsweetened butter – Softened but NOT melted
- Vanilla essence
- Icing sugar
- Balance of the milk soak (if used on your bubble tea cake)
- Matcha Powder and/or green food coloring – Matcha has a distinct taste. If you are serving this to people who have not had it before (children for example), you can lessen the matcha flavor and get the “look” of it, by omitting the matcha powder in the frosting and color the icing with soft green food coloring. Alternatively, you can omit the matcha powder in the boba tea cake and just add it to the icing.
Raspberry Drizzle Ingredients
- Fresh or frozen raspberries – You can make this with blueberries, strawberries, blackberries, or a mix of berries instead of raspberries if you like. The blackberries will make for a beautiful color variation on top of your bubble tea cake.
- Icing sugar
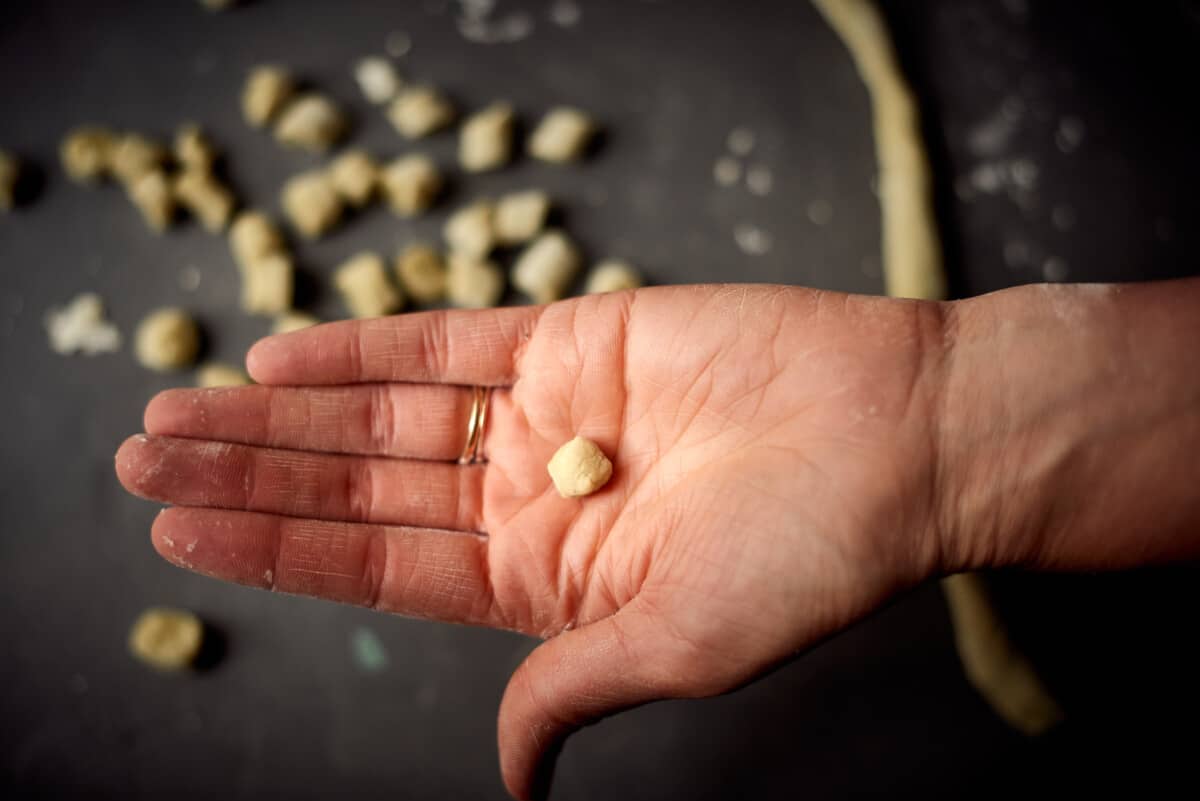
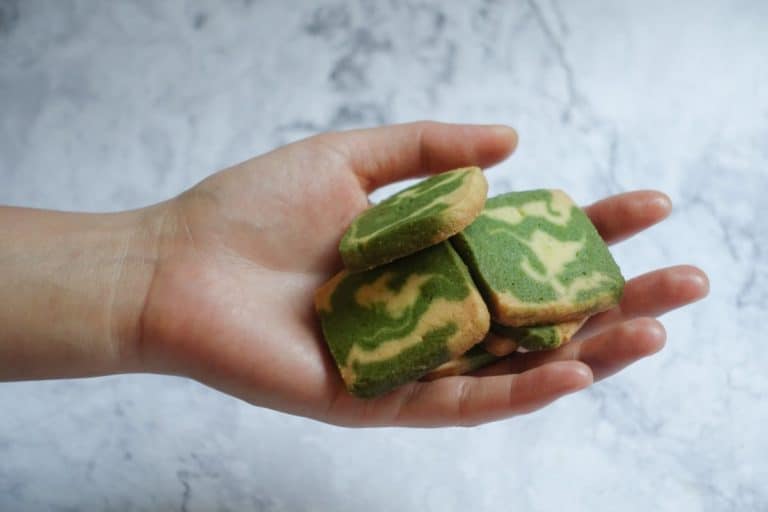
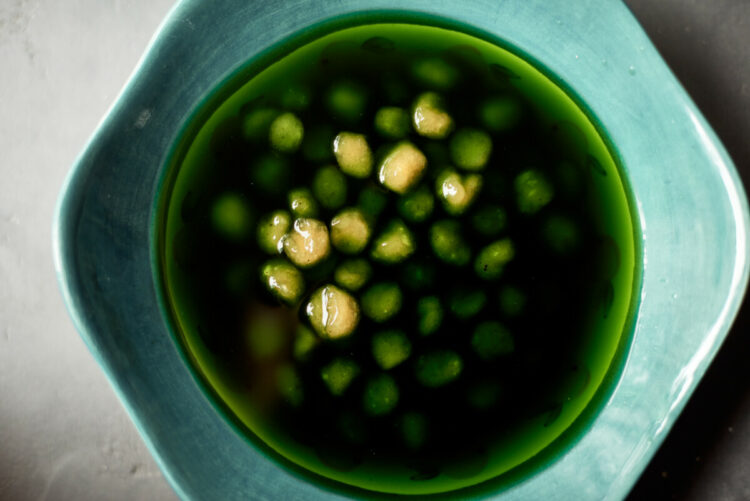
Boba Pearls aka Tapioca Pearls
Making boba pearls from scratch is for the adventurous baker. They are fun to make, but they take a little practice and a quick hand. If you would prefer, you can buy dried, pre-made boba pearls and boil them for 2-3 minutes (or according to the packet instructions). Making homemade pearls will deliver a more organic shape and result. The dough is lovely to work with and mold; you can choose to vary the size if you make them yourself. I love the earthiness of the matcha boba pearls that I made on this bubble tea cake. Try our fully illustrated instructions and recipe to make boba from scratch.
How to make the Matcha and Raspberry Bubble Tea Cake
If you are making the boba pearls from scratch, you should make these first. If this is your first time making them, it would be a good idea to make them the day before, when you have time and can enjoy the process. It is a bit fiddly the first time but definitely doable! Then make the matcha milk tea cake as you will need to let it cool completely before putting on the matcha frosting. Make the raspberry drizzle just as you’re about to glaze the boba tea cake to avoid forming a glaze “crust.”
Making the Matcha Milk Tea Cake
This is my granny’s simple vanilla sponge cake recipe, but you can use any vanilla sponge recipe you’re comfortable making. If you want to save some time with this whole cake and make it a little simpler, you can use a vanilla box cake. This recipe converts into cupcakes quite easily; all you’ll need to do is adjust the baking time.
I have updated this bubble tea cake recipe by adding a matcha milk soak. I wouldn’t try this with the cupcakes version, but it’s a lovely addition to the cake if you want to deepen the matcha flavor experience. You can also leave the milk soak step out completely.
Matcha tea cake steps
- Preheat your oven to 350°F / 180 °C and check that the middle oven rack is set up and . Grease, flour, and line 2 x 8-inch round baking tins with paper.
- Whisk dry ingredients – the cake flour, salt, and baking powder in a bowl and set the bowl to one side.
- Cream the butter and caster sugar until light and fluffy with a hand held or stand mixer until it is pale and light.
- Beat in one egg at a time. Add the vanilla in with the last egg.
- With the mixer going on slow, add the flour and 1 cup of milk, alternating between the two and starting with the flour. Do this by adding a third flour, half the milk, a third flour, the other half of the milk, and then the last of the flour.
- Bake the cakes for 30 minutes or until the cake springs bake when pushed gently with your finger.
- Cool for 10 minutes. Next, invert the cakes onto cooling wracks and remove the paper. Cool completely.
- (Optional) Make up the matcha milk soak when you’re ready to complete the cake. To do this, boil the kettle , mix 1 TBS boiling water in a little bowl, and wait 1 minute. Using a whisk, mix the powder and the water until lump-free. Add this to the 1/3 cup of milk that remains. Pour the matcha milk into a little jug and pour 2/3rds of it over both halves of the cake. Reserve the rest for your icing. Let the cake sit for 10 minutes before icing it. be mindful that a little matcha goes a long way. If you are serving this cake to guests who have not had matcha before, you might omit this milk soak.
- For the cupcake version of the bubble tea cake: fill greased cupcake cases 2/3rds of the way up. Check the cakes after 15 minutes. They will be done when they spring up when pushed at with a finger.
Tips
- You can use a plant-based butter or margarine if you prefer.
- When mixing in the eggs, they may look a little split. This is because each egg needs to be mixed in well before you add the next one.
- How to know when your bubble tea cake is done: Use a skewer. It should come out clean when inserted into the center of the cake. If there are crumbs and wet batter attached, continue baking.
- You can choose to store the cake halves later by wrapping them in plastic wrap and freezing or refrigerating them for a day or two.
- I’ve made a two-tier cake using 2 x 8-inch pans, but you could make a 3 tier cake recipe using 3 x 6-inch pans.
- Pour the milk soak over the underside of the cakes as they are more receptive and porous than the caramelized top of the cake.
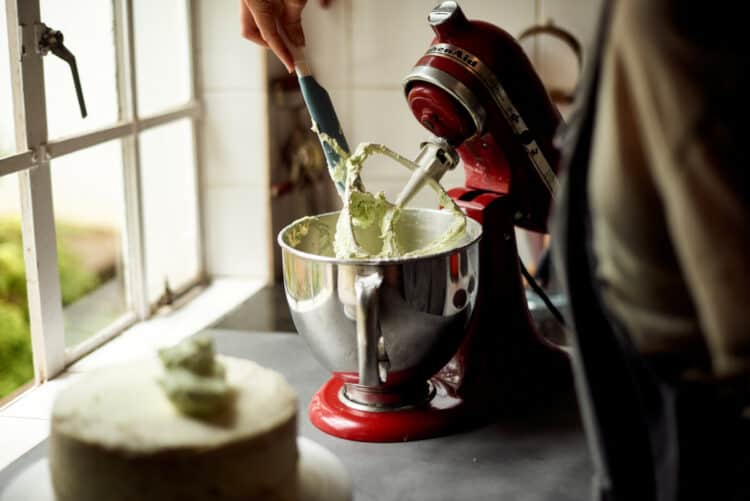
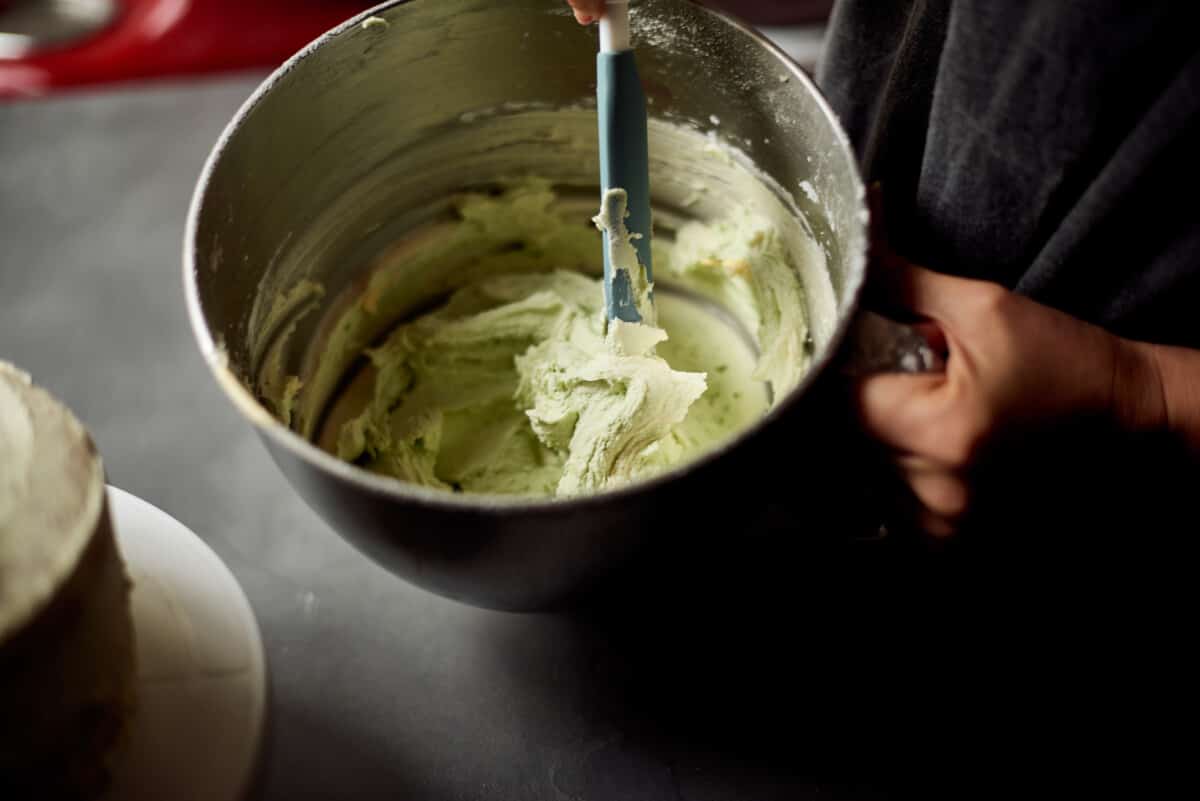
Making the Matcha icing/frosting
Depending on where you are, you’ll refer to this as either butter icing or frosting. If you’d rather lessen the matcha flavor and get the “look” of it, omit the matcha powder and color the icing with soft green food coloring. Keep in mind that matcha can have a strong flavor and a little bit goes a long way. My advice for the first time you make this bubble tea cake is to just use the matcha in the cake and use green food coloring in the icing.
- Beat your soft butter on medium speed. After a minute, add in the vanilla. You want the butter to be light and fluffy before adding the icing sugar.
- (Optional) Mix up the matcha with a bit of hot water to a smooth paste, and set aside.
- Slowly add the icing sugar to the butter. Add two tablespoons at a time and incorporate it well before adding the next spoon.
- Use the leftover milk soak to lighten your icing up if it looks a little dry.
- Add the matcha or a drop of your food coloring once all the icing sugar has been mixed in. Of course, a combination of the two is fine too.
TIPS
- I love to use butter in my icings, but you can use plant-based butter or margarine.
- Add a teaspoon of zest lemon rind if you want to soften the sweet flavor. Omit the vanilla in this instance.
- Cover the bowl of icing when you aren’t using it to avoid a crusty top from forming.
Making the Raspberry Drizzle
This simple slight drizzle takes the bubble tea cake from all sweet to well-balanced. It also looks exceptionally pretty.
- Blend the raspberries until smooth. I used a food processor, but you can also use a hand held beater.
- Add the icing sugar until a pourable glaze consistency is achieved. You might need to add more or less icing sugar, as the water content and size of the raspberries may vary.
TIPS
- You can make this with blueberries, strawberries, blackberries, or a mix of berries instead of raspberries if you like. The blackberries will make for a beautiful color variation.
- Make this just as you’re about to glaze the cake to avoid forming a glaze “crust.”
Matcha and Raspberry Bubble Tea Cake Assembly
Here are the steps to putting your bubble tea lava cake together
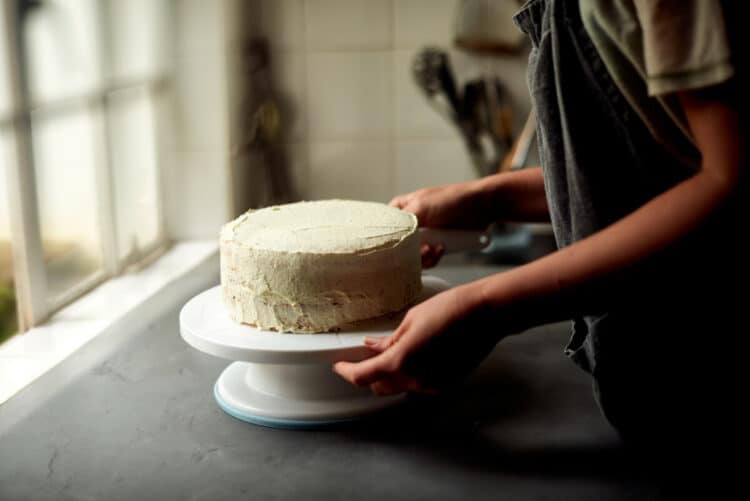
Step One – Create a crumb coating
I do this because I cannot stand crumbs lifting up and mixing with my beautiful butter icing. Place one of the layers on a cake stand/turn table with a blob of icing underneath the layer to stick it down securely. Fill the two or three layers with icing – I use a little, but you can use a lot if you like. Ice the sides and top of the cake, allowing crumbs to mix in with the icing. A thin layer will do fine. Refrigerate the cake until the icing is hard.
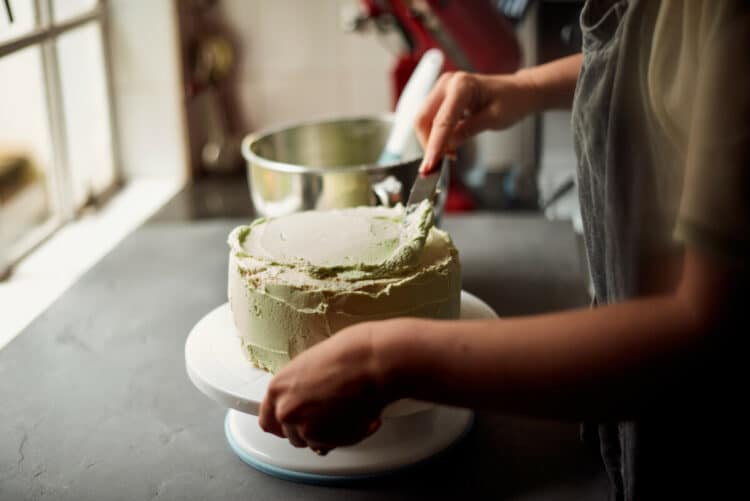
Step Two – Ice the cake
I like to start with the sides, getting them smooth but not perfect. You can make this cake look at perfect as you like; I personally prefer a “little rough around edges” look, but it’s up to you. Once the sides have been iced, ice the top. I like to create a bit of an edge at the top of my cake.
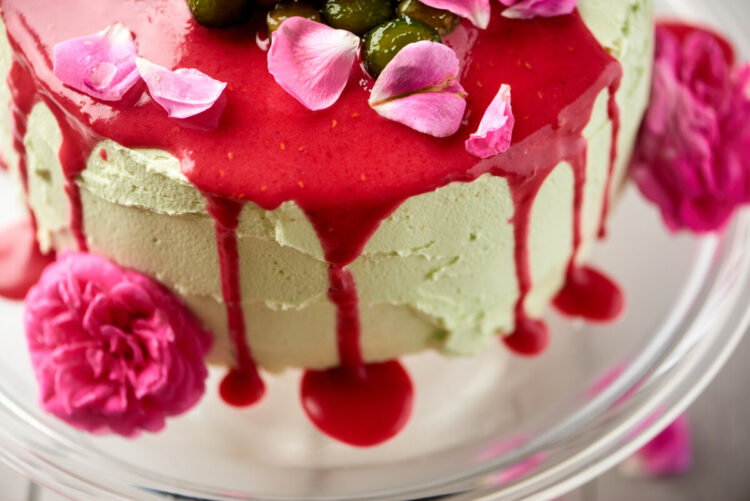
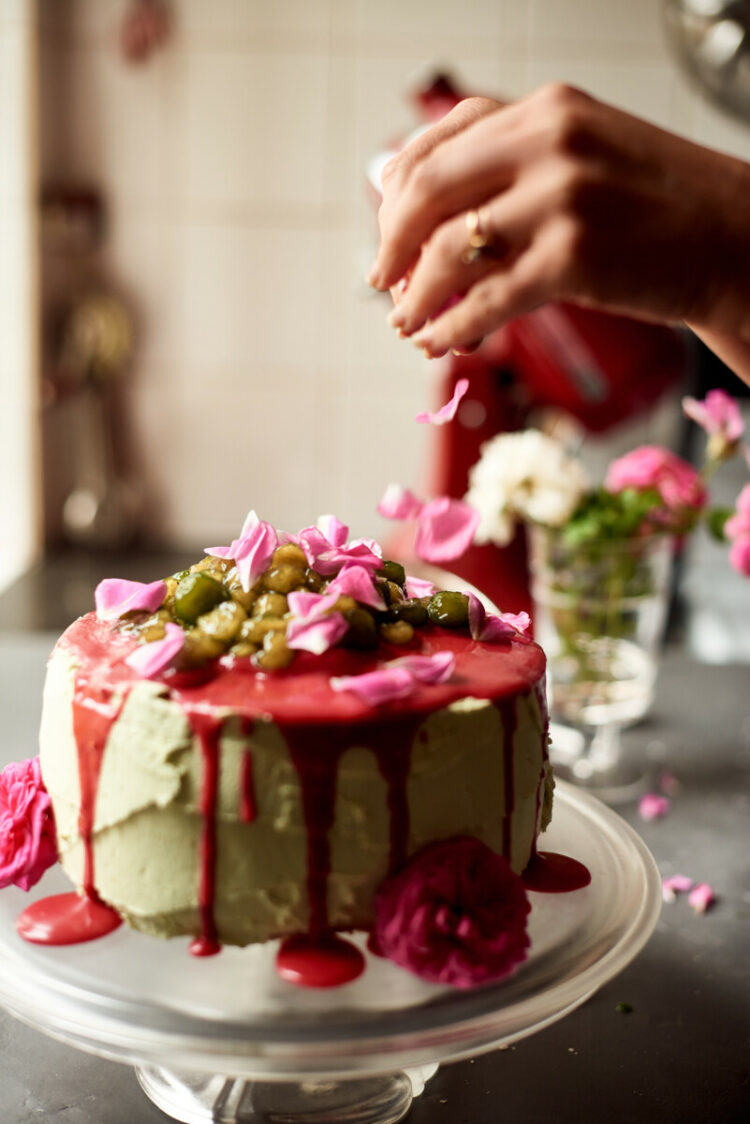
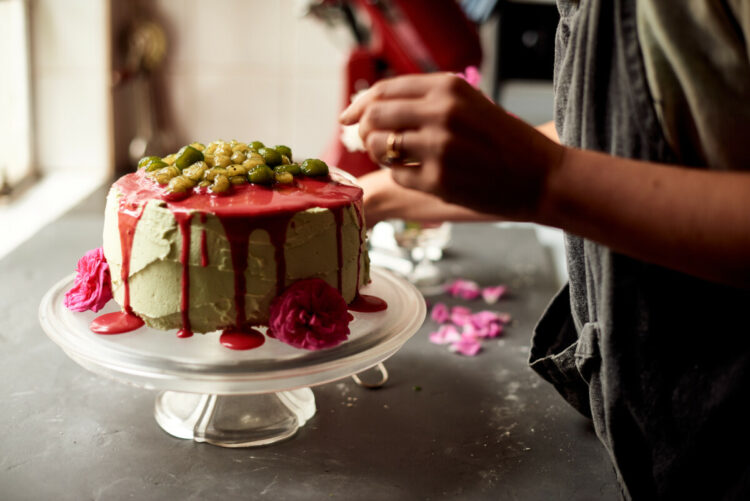
Step Three – Pour your raspberry drizzle
Pour your raspberry lava drizzle into the center of the top of the cake. Encourage it to drizzle and drip over the edges. I did this with my cake already on its display cake stand, but you can choose to do it before transferring it to its final resting place, depending on how messy you want to go.
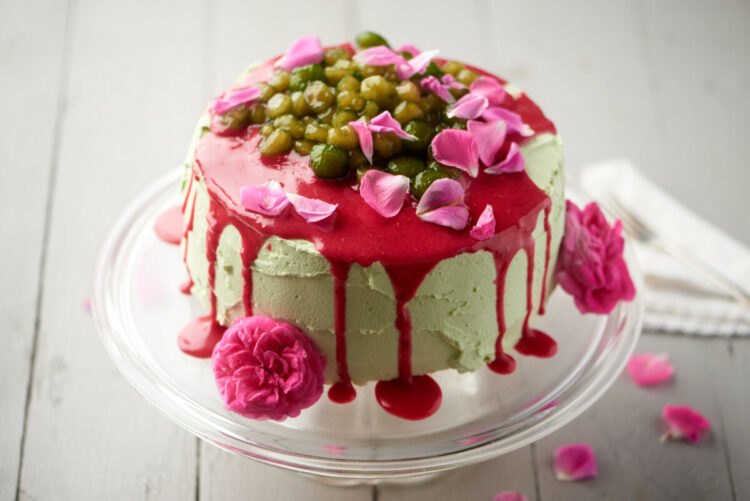
Step four – Top with your boba pearls
You can use your store bought boba pearls or try making the boba tapioca pearls from scratch. Drain your pearls from their steeping liquid and pile them on top, arranging them as you like. You could also decorate this matcha and raspberry tea cake with fresh raspberries in addition to the boba pearls. I’ve used some of my garden roses to pretty up the sides.
Step 5 – Decorate with Rose Petals or Raspberries or Mixed Berries
Serve with Matcha Tea or any tea of your choice.
Final thoughts
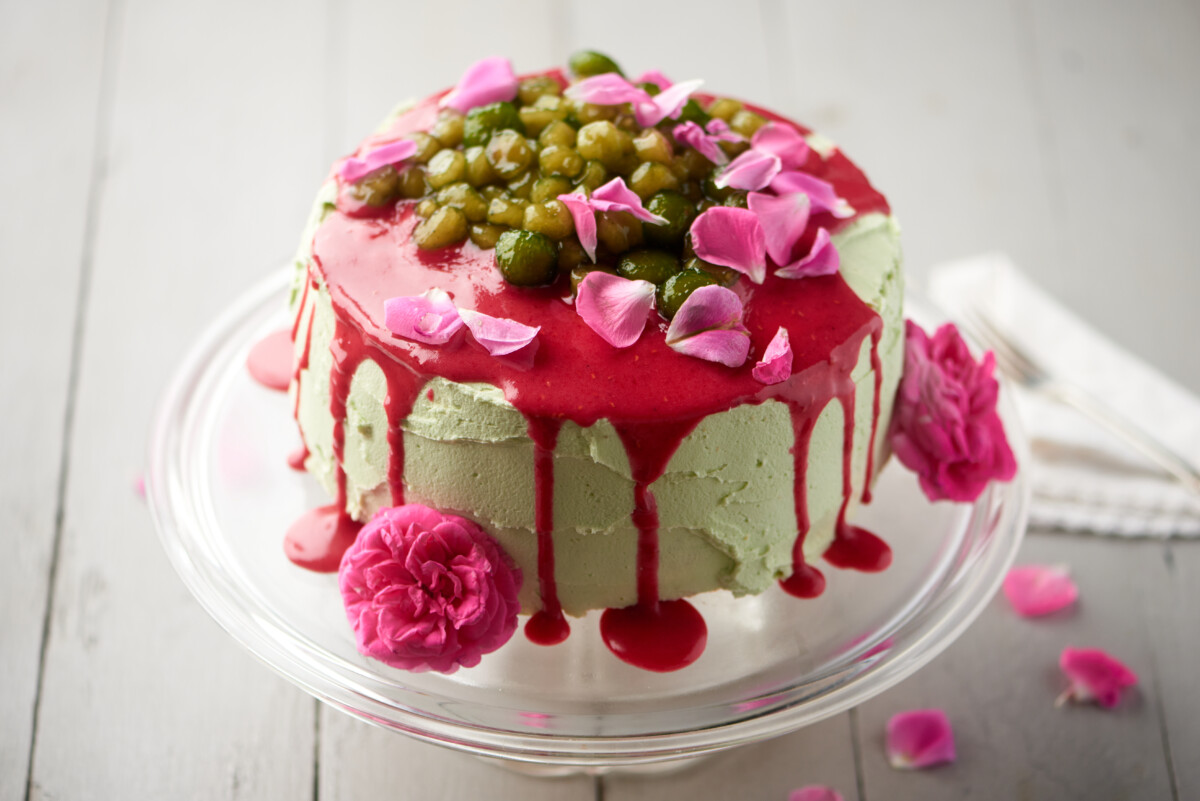
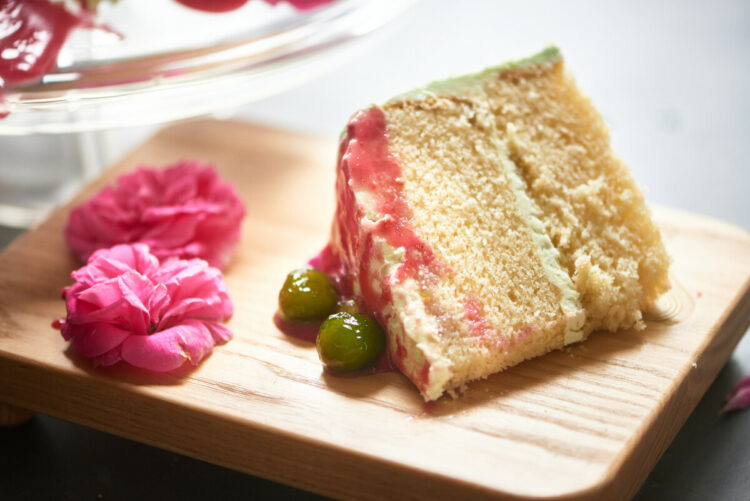
Each component of this matcha and raspberry bubble tea cake contributes to a tantalising taste journey. The vanilla/matcha sponge serves as a comforting base, subtly sweet and delicately moist. The tart raspberry drizzle provides a fruity pop that cuts through the richness of the icing, adding both taste and texture. The matcha boba pearls are the pièce de résistance, providing a fun chewy texture and further intensifying the matcha experience. When combined, these elements create a symphony of flavors that will leave your guests in awe at a tea party. The visual appeal of the cake, with its vibrant colors and contrasting textures, only adds to the charm of this delightful cake.
Matcha and Raspberry Bubble Tea Cake

This Matcha and Raspberry Bubble Tea Cake combines four incredible elements: a milk tea cake, matcha butter icing, raspberry drizzle, and matcha boba pearls. The rich, earthy flavor of matcha perfectly complements the tangy sweetness of the raspberry drizzle. And let's not forget the fun and visually stunning boba pearls on top, adding that extra wow factor to this gorgeous cake.
Ingredients
- For the Matcha Tea Cake:
- • 2 ¼ / 280g cups cake flour
- • 2 tsp baking powder
- • Pinch salt
- • 185g / ¾ cup butter, unsalted, at room temperature
- • 115g / 1 ½ cups caster sugar
- • 3 large eggs
- • 1 tsp vanilla essence
- • 1 1/3 cups whole milk
- • 1/3 tsp matcha powder
- For the Matcha Butter Icing/Frosting:
- • 250g/ 1.1 cup butter, softened (not melted)
- • ½ tsp vanilla essence
- • 500g/ 3 ¼ cups icing sugar, sifted and lump-free
- • Balance of the milk soak
- • ¼ tsp matcha powder or green food coloring
- For the Raspberry Drizzle:
- • 1 cup raspberries, fresh and clean
- • 125g / 1 cup icing sugar, sifted
- Home made or store bought boba/bubble balls or make boba from scratch
Instructions
Matcha Bubble Milk Tea Recipe:
- Check that the middle oven rack is set up and preheat your oven to 350°F / 180 °C.
- Grease, flour, and line 2 x 8-inch round baking tins with paper.
- Whisk together the cake flour, salt, and baking powder in a bowl and set the bowl to one side.
- Using a stand mixer with a K-beater or paddle attachment, cream the butter and caster sugar until light and fluffy. When it is pale and light, beat in one egg at a time. Add the vanilla in with the last egg.
- With the mixer going on slow, add the flour and 1 cup of milk, alternating between the two and starting with the flour. Do this by adding a third flour, half the milk, a third flour, the other half of the milk, and then the last of the flour.
- Pour the batter into the pans and bake the cakes for around 30 minutes or until the cake springs bake when pushed gently with your finger.
- Once the cake is ready, remove them from the oven and allow them to cool for 10 minutes. Next, invert the cakes onto cooling wracks and remove the paper. Cool completely.
- Make up the matcha milk soak when you’re ready to complete the cake. To do this, boil the kettle, mix 1 TBS boiling water in a little bowl, and wait 1 minute. Using a whisk, mix the powder and the water until lump-free. Add this to the 1/3 cup of milk that remains. Pour the matcha milk into a little jug and pour 2/3rds of it over both halves of the cake.
Reserve the rest for your icing. Let the cake sit for 10 minutes before icing it. - For the cupcake version: fill greased cupcake cases 2/3rds of the way up. Check the cakes after 15 minutes. They will be done when they spring up when pushed at with a finger.
For the Matcha Butter Icing/Frosting:
- In a stand mixer, beat your soft butter on medium speed. After a minute, add in the vanilla. You want the butter to be light and fluffy before adding the icing sugar.
- While the butter is whipping up and if you are using the matcha to color the icing, mix it up with a bit of hot or just boiled water to a smooth paste, and set aside.
- Start adding the icing sugar to the butter. Add two tablespoons at a time and incorporate it well before adding the next spoon.
- Use the leftover milk soak to lighten your icing up if it looks a little dry.
- Add the matcha or a drop of your food coloring once all the icing sugar has been mixed in. Of course, a combination of the two is fine too.
For the Raspberry Drizzle:
- In a blender or food processor, blend the raspberries until smooth.
- Add the icing sugar until a pourable glaze consistency is achieved. You might need to add more or less icing sugar, as the water content and size of the raspberries may vary.
Boil your store bought or make boba from scratch
Assembly of the Matcha and Raspberry Bubble Tea Cake:
Here are the steps to putting your matcha and raspberry bubble tea cake together
- Dirty ice your cake, aka create a crumb coating. I do this because I cannot stand crumbs lifting up and mixing with my beautiful butter icing. Place one of the layers on a cake stand/turn table with a blob of icing underneath the layer to stick it down securely. Fill the two or three layers with icing – I use a little, but you can use a lot if you like. Ice the sides and top of the cake, allowing crumbs to mix in with the icing. A thin layer will do fine. Refrigerate the cake until the icing is hardened.
- Ice the cake with a second smooth coating. I like to start with the sides, getting them smooth but not perfect. You can make this cake look at perfect as you like; I personally prefer a “little rough around edges” look, but it’s up to you. Once the sides have been iced, ice the top. I like to create a bit of an edge at the top of my cake.
- Pour your raspberry drizzle into the center of the top of the cake. Encourage it to drizzle and drip over the edges. I did this with my cake already on its display
cake stand, but you can choose to do it before transferring it to its final resting place, depending on how messy you want to go. - Top with your boba pearls. Drain your pearls from their steeping liquid and pile them on top, arranging them as you like. You could also decorate this cake with fresh raspberries in addition to the boba pearls. I’ve used some of my garden roses to pretty up the sides.
Notes
Tips for the Matcha Bubble Tea Cake
· You can use a plant-based butter or margarine if you prefer.
· When mixing in the eggs, they may look a little split. This is because each egg needs to be mixed in well before you add the next one.
· If you’re looking for a less-risky way of testing the cake’s “doneness,” use a skewer. It should come out clean when inserted into the center of the cake. If there are crumbs and wet batter attached, continue baking.
· You can choose to store the cake halves later by wrapping them in plastic wrap and freezing or refrigerating them for a day or two.
· I’ve made a two-tier cake using 2 x 8-inch pans, but you could make a 3 tier cake recipe using 3 x 6-inch pans.
· Pour the milk soak over the underside of the cakes as they are more receptive and porous than the caramelized top of the cake.
Tips for the Matcha Butter Icing/Frosting:
· I love to use butter in my icings, but you can use plant-based butter ormargarine.
· Add a teaspoon of zest lemon rind if you want to soften the sweet flavor. Omit the vanilla in this instance.
· Cover the bowl of icing when you aren’t using it to avoid a crusty top from forming.
Tips for the Raspberry Drizzle:
· You can make this with blueberries, strawberries, blackberries, or a mix of berriesinstead of raspberries if you like. The blackberries will make for a beautifulcolor variation.
· Make this just as you’re about to glaze the cake to avoid forming a glaze “crust.”